Duke City Herbs
Mushroom Liquid Cultures HEALTH & BRAIN SUPPORT
Regular price
$25.00 USD
Regular price
$10.00 USD
Sale price
$25.00 USD
Unit price
per
Shipping calculated at checkout.
Couldn't load pickup availability
Handmade
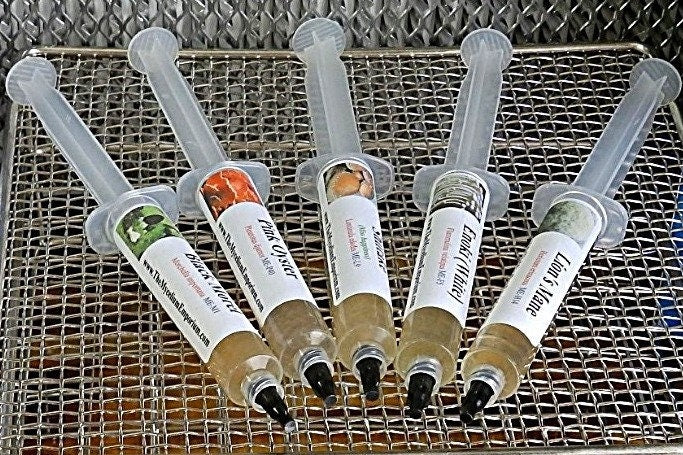
With all cultures you will receive a sterile 10-12cc syringe full of %100 CLEAN actively growing mycelium in a liquid solution along with a needle.
Usually ships within 24 hours after receiving payment.
Basic Instructions
A Liquid Culture (LC) is a sample of live mushroom mycelium suspended in a liquid medium with nutrients added and stored in a syringe for easy use. It can be stored at room temp (for warm weather species) or in the fridge (for all other species) for up to a year and sometimes longer. But best if used within a few months.
Creating grain spawn with your Liquid Culture is usually the 1st step in growing mushrooms. Many different types of grains can be used for spawn such as oats, wheat, rye, wild bird seed and even popcorn. Without a doubt Rye is the most common grain used for mushroom cultivation. Mushrooms seem to like it most because of its water absorbing qualities and nutrient makeup.
Step 1: Rinse and clean the grains, soak in water for 12-24 hours (optional)
Step 2: Cook / Simmer the grains for 15-20 minutes so that they absorb water.
Step 3: Drain and dry excess moisture from the outside of the grains.
Step 4: Load grain into mason jars (with special lids) to about 2/3rd – 3/4th full
Step 5: Cover the lids with tinfoil. This will prevent water from the pressure cooker
spilling into your grain and changing the moisture content of the jar.
Step 6: Sterilize for 90 minutes at 15 PSI.
Note: Quickest , cheapest and easiest way to make lids it to use a nail (or paper punch) to make a hole in the lid, then cover hole with 2-3 layers of medical (paper-type) micropore tape. There are many other ways to make these lids found online or on you tube.
Once the jars are cooled you are now ready to use your liquid culture syringe. Usually about 1–2 CC’s of liquid culture is sufficient per quart sized grain jar. First you should shake the syringe (the reason for the air bubble) to evenly distribute the culture throughout the syringe. While working in a clean wiped down area and with clean hands (rubbing alcohol and Lysol works best) take the cap off and put the needle on. Next you need to flame sterilize the needle of the syringe until it is red hot. Then you simply inject the liquid culture right though the filter or injection port on the top of the jar. The first bit of liquid will cool down the syringe. If using the medical tape make sure to put another piece of tape over injection hole on the jar. Repeat the flame sterilizing of the needle for every jar your injecting. Each syringe can do up to 10 grain jars. Now put your newly inoculated jars somewhere at room temperature and away from direct sunlight. The mycelium will now grow happily in normal room temperature conditions. Watch the jars periodically you will notice mycelium growth (usually white) this is called colonization. Once the jar is about %25-35 colonized you should shake the jars to evenly spread out the grain, which allows for faster overall colonization. Depending on the species of mushrooms, it can take about 1-3 weeks before the jar is fully colonized. Once the jars are fully colonized you are ready to use this grain spawn on substrate such as sterilized or pasteurized hardwood sawdust , straw and many others to grow mushrooms.
Please keep in mind that this is just a basic set of instructions there are many other ways a Liquid Culture Syringe can be used such as directly injecting into substrate (not recommended), adding substrate to the grain jars and growing right in the jars (or bags) and so on.
You can find good videos on Youtube. Try searching Ultimate indoor mushroom grower tutorial or Let's grow mushrooms
Materials
Materials
Shipping & Returns
Shipping & Returns
Dimensions
Dimensions
Care Instructions
Care Instructions


